


The Vessel’s Codex: A Technical Deep Dive into Hallownest’s Mastery
Hollow Knight is a masterclass in atmospheric storytelling, but beneath its melancholic, hand-drawn exterior lies a mechanically demanding engine that rewards frame-perfect precision and deep systemic knowledge. To truly conquer Hallownest, a player must move beyond simple exploration and begin to treat the game as a series of fluid, interconnected physics problems. Success is not merely found in having the most health, but in the efficiency of your movement, the optimization of your SOUL economy, and the mastery of your "i-frames." This guide is designed for the traveler who has moved past the initial wonder of the Crossroads and is ready to tackle the game’s most punishing trials, from the Path of Pain to the Pantheon of Hallownest.
The journey through this guide reflects the progression of a Master Knight: starting with the fundamental physics of the Nail, moving through the strategic layering of Charms, and finally mastering the boss-specific "dances" required for the endgame. By internalizing these technical nuances, you turn the Knight from a fragile vessel into a force of pure Void. Let us descend into the technical heart of the kingdom.
1. The Physics of the Nail: Mastering Momentum and Recoil
The most fundamental aspect of Hollow Knight’s combat is the "Knockback" or recoil that occurs when the Knight strikes an enemy. While beginners often find this recoil frustrating because it pushes them away from their target, advanced players utilize it for positioning. By striking an enemy and immediately dashing forward, you can negate the knockback momentum and maintain a constant DPS (damage per second). This is particularly vital when using the Mark of Pride charm, as the increased reach allows you to manipulate this spacing from a safer distance, effectively "kiting" enemies while staying in range.
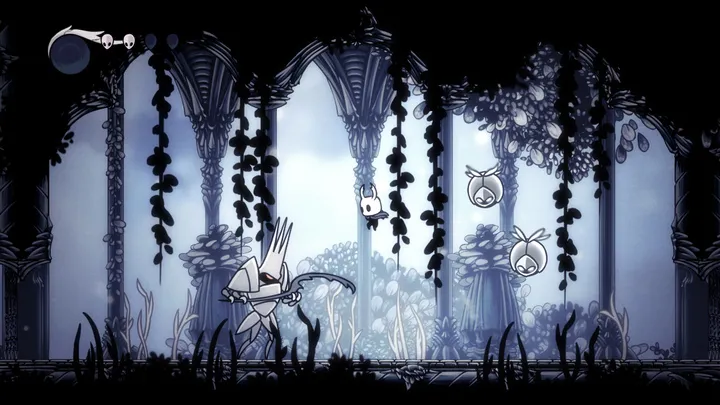
The "Pogo" is the technical cornerstone of the game. By striking downward in mid-air, the Knight bounces off enemies, spikes, or projectiles. This resets the Knight’s double-jump (Monarch Wings) and dash (Mothwing Cloak/Shadow Dash). In high-level play, you should almost never touch the ground during boss fights like the Mantis Lords or Lost Kin. Mastering the pogo-drift—holding left or right while maintaining a vertical bounce—allows you to orbit a boss, staying in their blind spot while dealing consistent damage.
+1
Advanced Nail Maneuvers
- Nail Arts Charging: You should always be holding the attack button to charge a Great Slash or Dash Slash while maneuvering. This allows for a massive burst of damage the moment an opening appears without sacrificing movement.
- The Cyclone Extension: Mashing the attack button during a Cyclone Slash increases the number of hits and the duration of the spin, which is essential for maximizing SOUL gain from larger enemies.
- Parrying: Striking at the exact moment an enemy attacks can nullify damage. While difficult, it is the only way to stay aggressive against bosses like Pure Vessel during their long-range thrusts.
2. SOUL Economy: The Strategic Balancing of Focus and Spells
SOUL management is a zero-sum game that separates survivors from masters. Every 33% of your SOUL vessel can either be used for a Focus (healing one mask) or a Spell (dealing massive damage). In late-game encounters, particularly against "Double Damage" bosses, healing becomes a strategic trap. It is often mathematically superior to spend your SOUL on Descending Dark or Shade Soul to end the fight faster, rather than trying to heal in a chaotic arena where you are likely to be hit again.
The internal cooldown of the Focus animation is fixed, but the SOUL cost of spells can be manipulated. If you are playing a "Spell Build," your goal is to minimize the time spent standing still. Spells provide a brief moment of "time-stop" for the enemy's AI to recalculate, which can be used to your advantage. By firing a Shade Soul immediately after a dash, you can push enemies back into environmental hazards or prevent them from initiating their next attack cycle.
3. The Invulnerability Frame (i-frame) Meta
Understanding "i-frames" is the difference between life and death in the Pantheon. The Shade Cloak provides a dash that is invulnerable to damage, but it has a specific 1.5-second cooldown. High-level combat is built around tracking this internal clock. If you dash too early, you will be vulnerable when the boss’s projectile actually reaches you. You must learn to "walk through" attacks rather than dashing away from them, saving your dash for when you are truly cornered.
The Power of Descending Dark
Perhaps the most "broken" mechanic in the game is the i-frame window provided by the Descending Dark spell. After the initial dive, the Knight is immune to damage for nearly 0.4 seconds. This is a massive window that allows you to dive directly into a boss’s attack—such as Nightmare King Grimm’s fire pillars—take zero damage, and deal massive AoE damage in return. It is a proactive defensive tool that every master must learn to "spam" during high-intensity boss phases.
4. Charm Synergies: Building the Ultimate Loadout
Charms are the "logic" of your build. For a Nail-focused build, the synergy between Quick Slash and Steady Body is the gold standard. Steady Body removes the Knight’s own recoil, allowing you to stand still while mashing the attack button. This effectively triples your attack speed against stationary or staggered bosses. When combined with Unbreakable Strength, your raw physical output becomes high enough to skip entire boss phases by forcing staggers.
+1
For the endgame, "Spell Twister" and "Shaman Stone" are non-negotiable. Shaman Stone doesn't just increase damage; it increases the hitbox of your spells. This makes it significantly easier to land multiple hits with a single Shade Soul on larger bosses. If you are struggling with platforming challenges like the White Palace, the synergy of Hiveblood and Grubsong provides infinite health, as Hiveblood regenerates the last mask lost and Grubsong provides SOUL to heal any others.
Top-Tier Charm Combinations
- The DPS King: Unbreakable Strength + Quick Slash + Mark of Pride + Steady Body.
- The Spell Caster: Shaman Stone + Spell Twister + Soul Catcher + Dream Wielder.
- The Tank: Quick Focus + Shape of Unn + Grubsong + Deep Focus.
5. Sequence Breaking and Early Game Optimization
Mastering Hallownest requires knowing when to ignore the "intended" path. "Sequence Breaking" allows you to obtain powerful items early. For example, using a "Vengefly Pogo" in the Forgotten Crossroads allows you to reach the Brooding Mawlek and a Mask Shard before obtaining any movement abilities. Similarly, you can skip the Mothwing Cloak requirement for certain areas by using "Damage Boosting"—taking damage from a hazard to use the knockback to reach a ledge.
Early game efficiency relies on the "Nail Upgrade" cycle. You should prioritize the Pale Ore found at the top of Hallownest’s Crown (accessible via a precise pogo on a crystal) or in the Ancient Basin. Having a "Channeled Nail" before fighting the Soul Master turns a difficult fight into a trivial one. Always track your "Geo-per-Minute" by utilizing the Fragile Greed charm in the early biomes, as the cost of Lumafly Lantern and Stag Stations is the primary bottleneck for new runs.
6. The Dream Nail: Resource Harvesting in Combat

The Dream Nail is more than a lore tool; it is a portable SOUL battery. By striking a staggered boss or a slow-moving enemy with the Dream Nail, you gain a full 33% SOUL without dealing damage. This is the secret to entering the second phase of a boss fight with full health. The Dream Wielder charm is a hidden gem in the meta, as it slashes the wind-up time of the Dream Nail, making it viable to use during active combat animations.
High-Value Dream Nail Targets
- Failed Champion: You can keep him in a permanent stagger loop by Dream Nailing him, hitting his armor to reset the stagger timer, and then Dream Nailing again.
- Uumuu: During the Godhome version of the fight, Dream Nailing Uumuu is the only consistent way to maintain SOUL for healing while dodging the electric bursts.
- Small Mobs: In the Trial of the Fool, always leave one slow shielded enemy alive at the end of a wave to Dream Nail them back to full health.
7. Navigating the Verticality of Kingdom’s Edge and Deepnest
As the game moves into the mid-to-late stages, the biomes become environmental hazards themselves. Kingdom’s Edge is a test of "Vertical Spacing." The Great Hoppers are designed to punish players who panic-dash. The technical counter is the "Under-Dash": as they jump toward you, dash directly under them. Their hitbox is narrow, and their landing lag allows for a free Great Slash from the rear.
Deepnest, conversely, is a test of "Sound-Based Combat." Many enemies in this biome spawn off-screen. By listening for the skittering audio cues, you can time a Great Slash to hit an enemy before they even appear on your screen. This biome also introduces the "Stalking Devout," which can only be damaged when they open their masks. The secret here is to stand just outside their range and use a "Dash Slash" to hit them the millisecond they reveal their face, negating their multi-slash counter.
8. Trial of the Fool: Managing Chaos in a Closed Box
The Coliseum of Fools is the ultimate test of aerial physics. The final trial, the Trial of the Fool, features a notorious "No Floor" section. During this phase, your pogo ability is your only survival tool. The secret is "Target Prioritization": kill the Squibs and Winged Fools immediately with Great Slashes, as their erratic flight patterns are the biggest threat to your pogo rhythm.
Survival Tips for the Coliseum
- Nailmaster’s Glory: This is a 1-slot charm that is mandatory for the Coliseum. It allows you to charge Nail Arts in half the time, letting you one-shot almost every flying enemy as they spawn.
- Focus Windows: Only heal during the waves with the slow-moving Shielded Fools. Kill all other enemies, then "kite" the last Shielded Fool around the arena to refill your masks.
- God Tamer Strategy: Ignore the Tamer; focus entirely on the Beast. Once the Beast dies, the fight ends. Use Descending Dark on the Beast when it rolls to deal damage through its armor.
9. The White Palace and the Path of Pain: Platforming Precision
The White Palace is not a test of combat, but of "Directional Inputs." The Knight has a slight "float" at the end of a jump; mastering the "Cancel-Drop" (letting go of the jump button to fall faster) is required to navigate the buzzing saws. In the Path of Pain, the most difficult section is the final room. Many players fail here because they switch from "Platforming Mode" to "Combat Mode" too slowly when the Kingsmoulds appear.
Path of Pain Loadout
- Hiveblood: Non-negotiable for infinite attempts.
- Grubsong + Grubberfly’s Lament: This secret synergy generates massive SOUL whenever you take damage, ensuring you always have enough to heal.
- Longnail: Do not use Mark of Pride here; the extra length can actually mess up your pogo timing on the narrow sawblades, causing you to hit a ceiling spike.
10. The Pantheon of Hallownest: The Ultimate Endurance Test

The Pantheon of Hallownest (PoH) is a 45-minute gauntlet of every boss in the game. Success here is about "Phase Memory." You must be able to fight the early bosses with zero damage to preserve your "Mental Stamina" for the final climb. The "Rest Areas" every five bosses are for more than just swapping charms; they are for resetting your heart rate.
The final trio—Markoth, Pure Vessel, and Absolute Radiance—are the gatekeepers. Against Markoth, never use spells until his second phase (two shields), then spam Shade Soul to kill him before the projectiles overwhelm you. Against Pure Vessel, treat the fight like a dance: jump over every lunge and pogo his head once. Against Absolute Radiance, the final climb is a test of "Panic Management." Do not look at the boss; look at the Knight and the lasers. If you can keep your character safe, the win will follow naturally.
Conclusion
Hollow Knight is a game that rewards those who look deeper into its clockwork mechanics. By mastering the recoil of the Nail, the invulnerability frames of your spells, and the strategic depth of your charm loadouts, you transform Hallownest from a terrifying labyrinth into a proving ground. Every boss, every sawblade, and every spike trap is a lesson in precision. As you master the pogo and the "i-frame" dive, you move beyond the limitations of a simple bug and become a true Godseeker. Hallownest is a graveyard of many bugs, but with these technical insights, you will not be one of them. Take these lessons into the Abyss and emerge as the King of the Void.